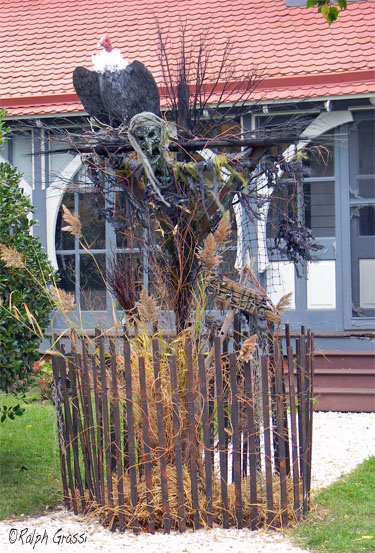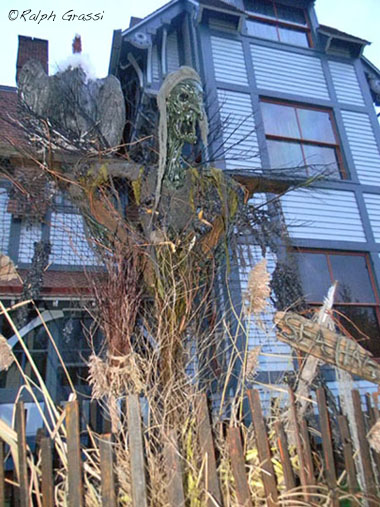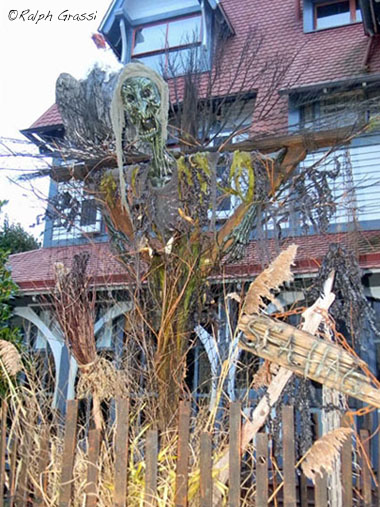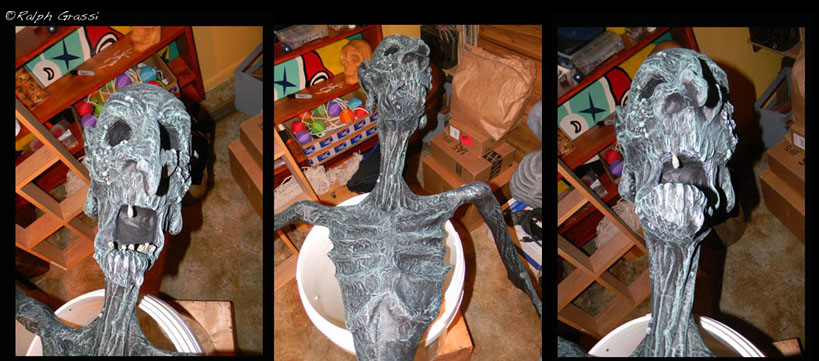
I began building the Sea Hag in mid-August in order to have her completed and ready for display in early October. Both the vulture and the Sea Hag are sculpted with papier mache and sealed with four coats of polyurethane to endure the elements. |
|
|
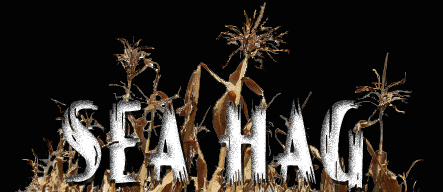
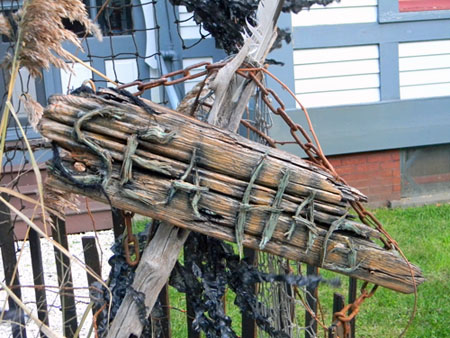
The Sea Hag sign is made with driftwood and old chain and I used pieces of mulch (which I painted) for the lettering.. |
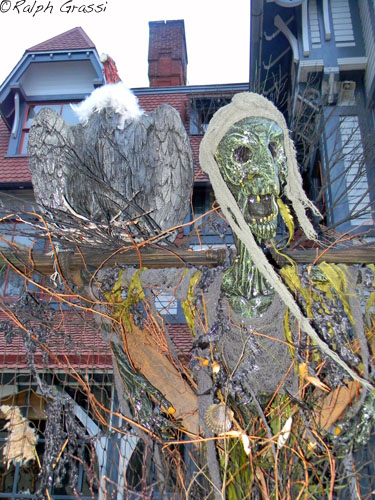
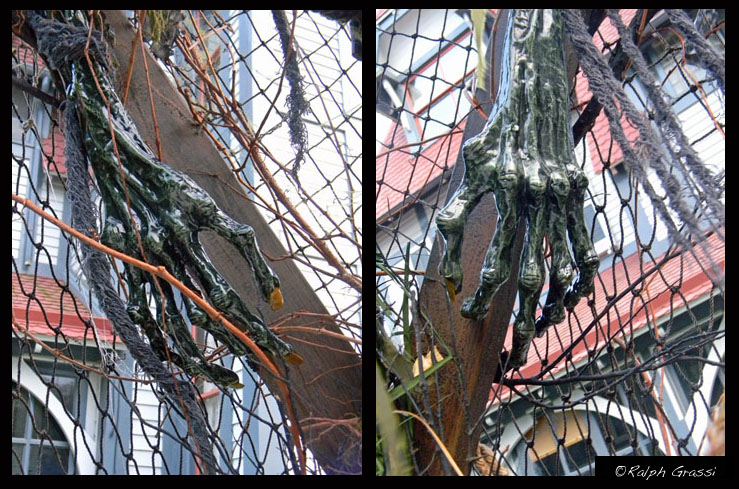
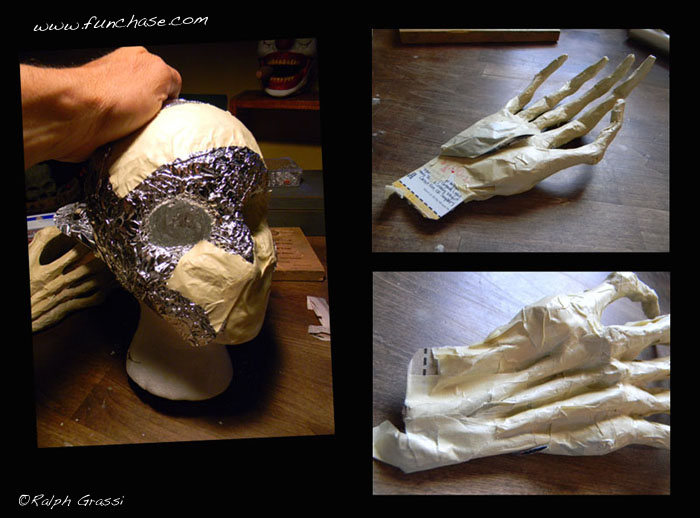
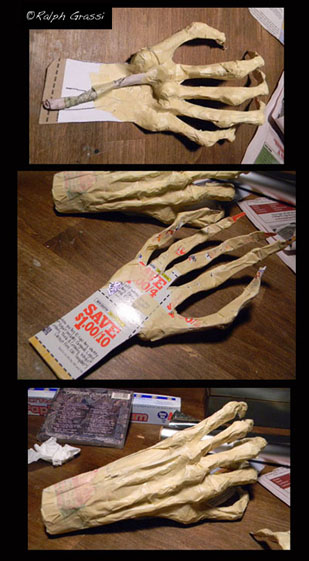
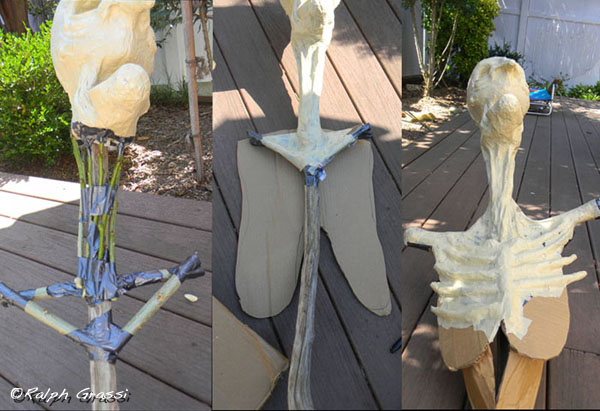
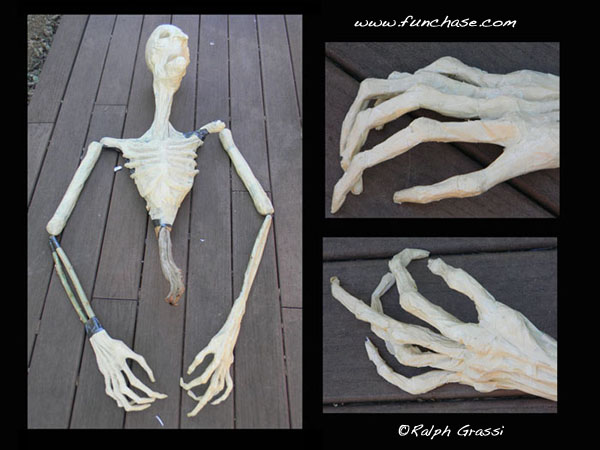
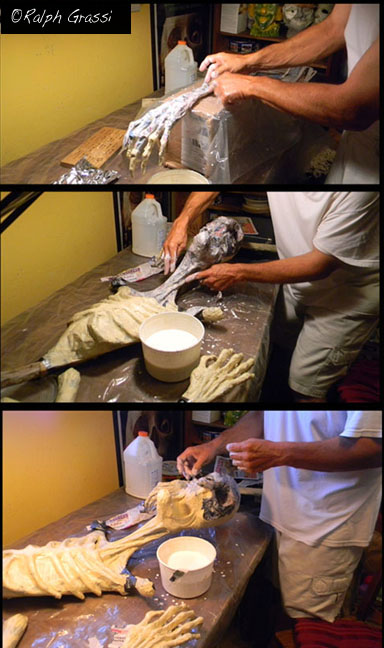
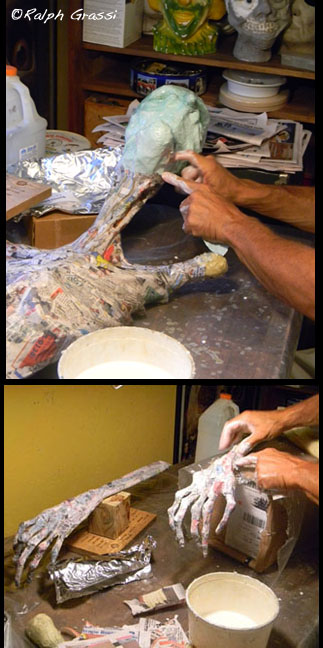
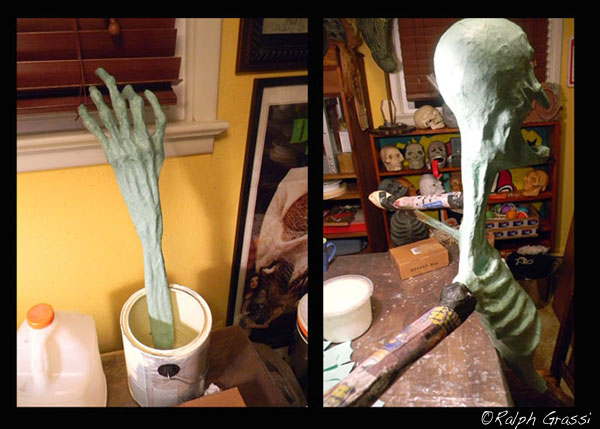
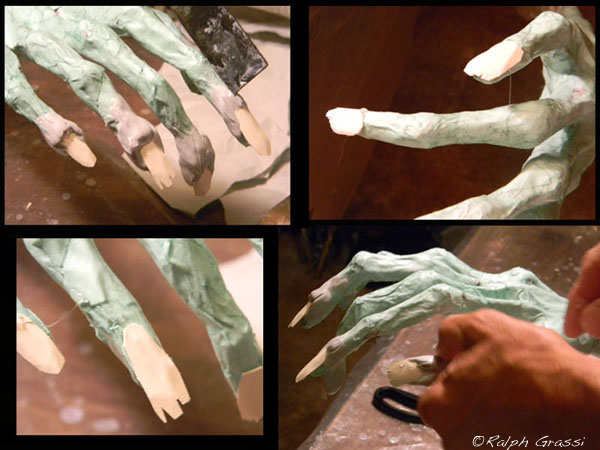
To make the head, I used a styrofoam wig head for my base form. For the hand shapes I outlined my hands on a cardboard cereal box and then cut them out and bent each finger to create the joints. I then built out the hands using newspaper and masking tape. |
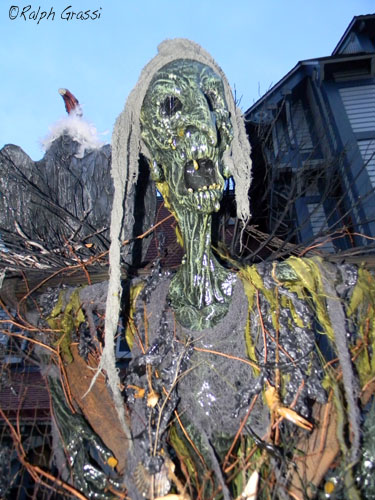
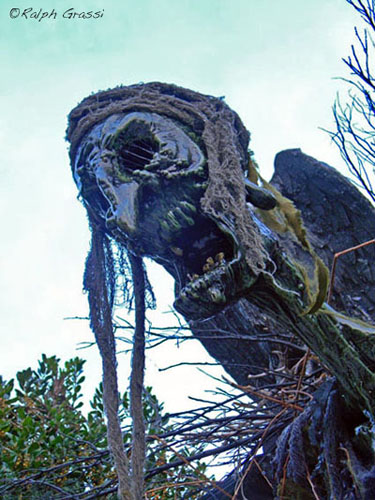
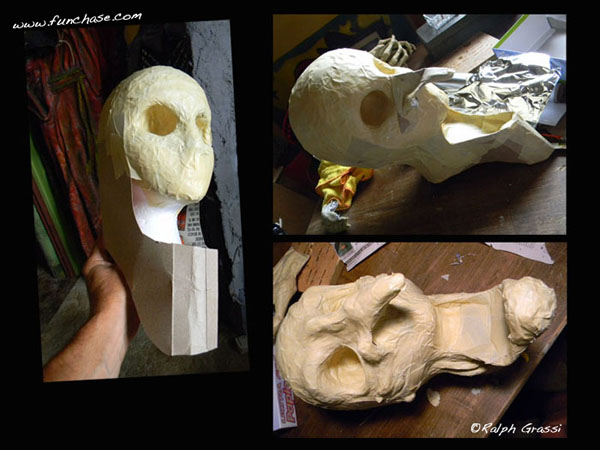
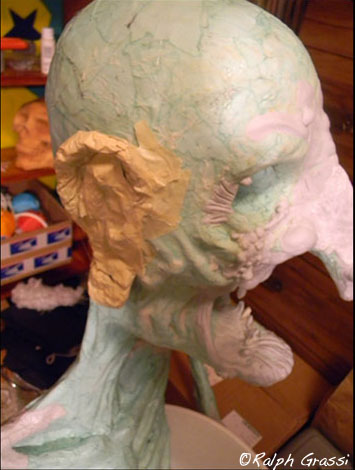
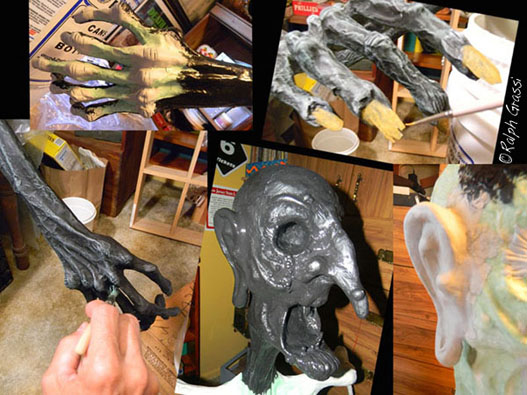
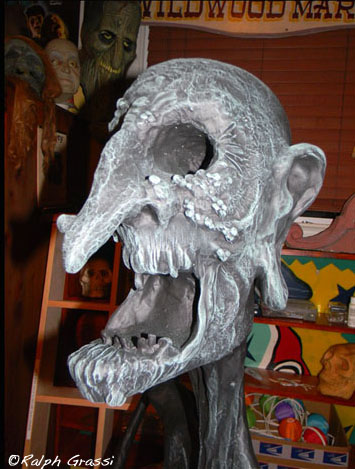
The head is built out in the same way using cardboard, paper, and tin foil to create the nose, jaw, chin and cheekbones. |
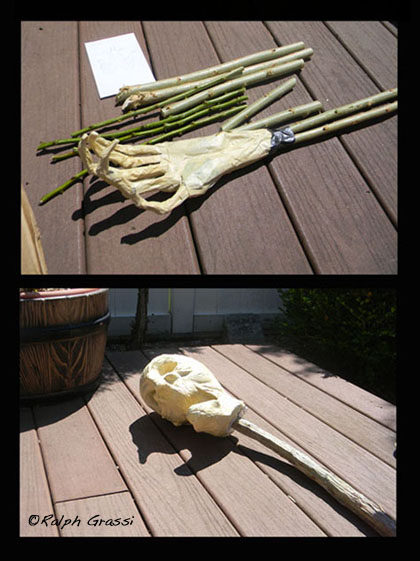
Using tin foil, I created the knuckles, hand bones and veins. Tree branches were used to create the arms and shoulders as well as neck muscles and tendons and I used a solid piece of curved driftwood as the center support. |
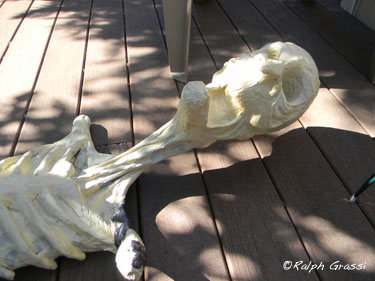
Cardboard was used to form the back and chest; then built out with twisted newspaper and masking tape creating the sternum and ribcage. |
The upper and lower arms were connected with screws and duct tape. |
Thinking that I would be applying hair to her head I originally constructed it without ears (knowing they would not be visible). However after adding the hair I realized it would cover up most of the detail I put into the face and neck so I decided to eliminate the hair alltogether and quickly made her ears. |
The photos below show the papier mache process; tearing paper into strips and dipping them into a mixture of white glue and water. The strips are then applied to the figure. Many layers are applied allowing sufficient drying time in between layering... a time consuming process. I found that using different colored paper for each layer made it easy to distinguish what areas had been done. |
To create fingernails I cut pieces from a plastic vertical blind and affixed them with hot glue, then used scissors to create chips and splits. I built out the cuticles with epoxy resin. |
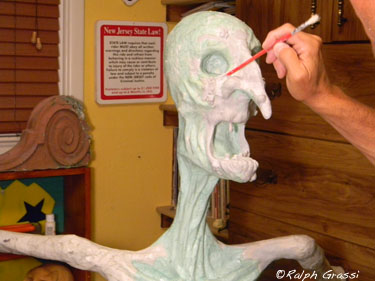
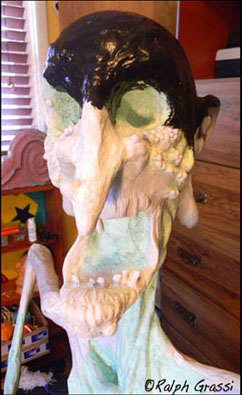
Much of the facial detail including teeth, warts, splits and cracks were created with an epoxy resin (similar to modeling putty). Once the detail is completed the brush work begins. |
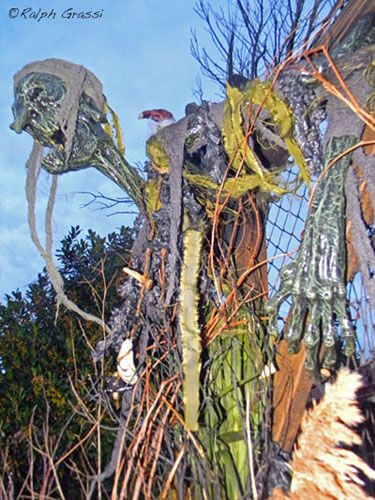
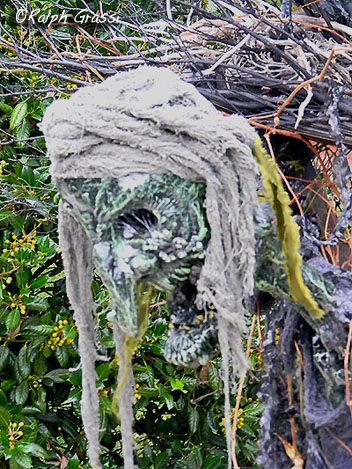
A base coat of flat black was applied to the entire piece followed by a lot of detail brush work in shades of greens and white. Webbing effect to the face was done last and was achieved by using a hot glue gun. The kerchief was created with netted green cloth (aka haunted cloth) which can be torn and twisted and used in a variety of applications (see below right).
|
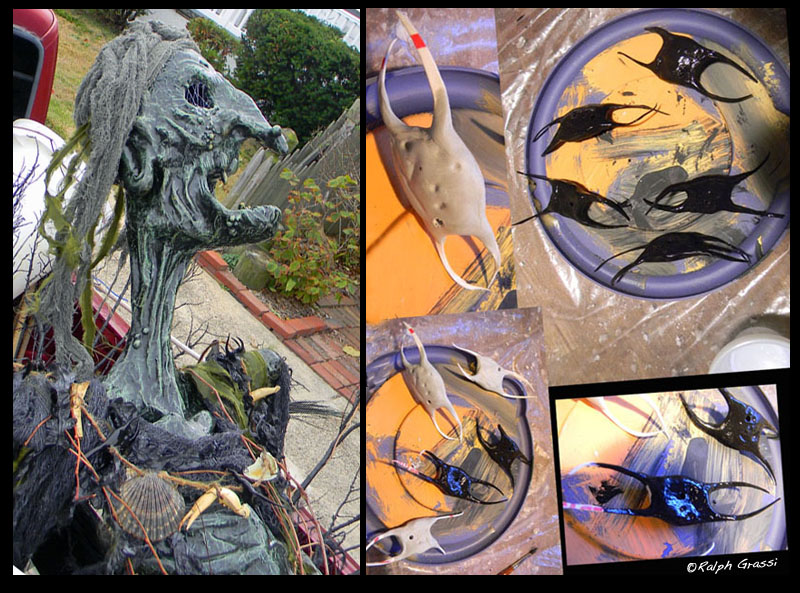
Pictured below right is my homemade version of skate egg cases (aka devil's pocketbooks). Weeks were passing and I could not find any of these objects on our beach... so I made my own from cut plastic built out with epoxy resin. Once painted with a glossy black finish they looked like the real thing. I strung these cases (along with crab legs and seashells) together and created a witchy neckless, that looked like it came from the depths of the sea (pictured below left). |
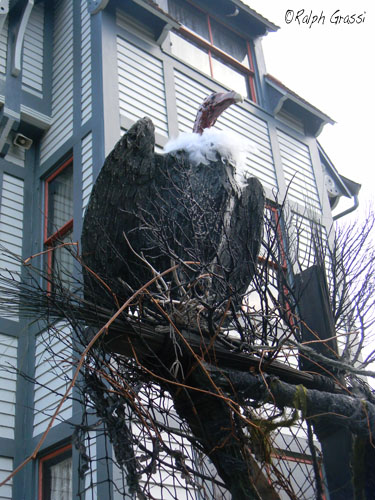
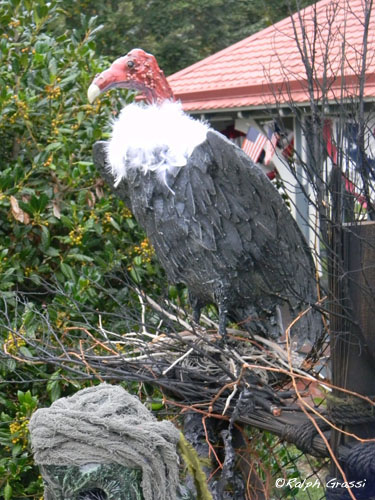
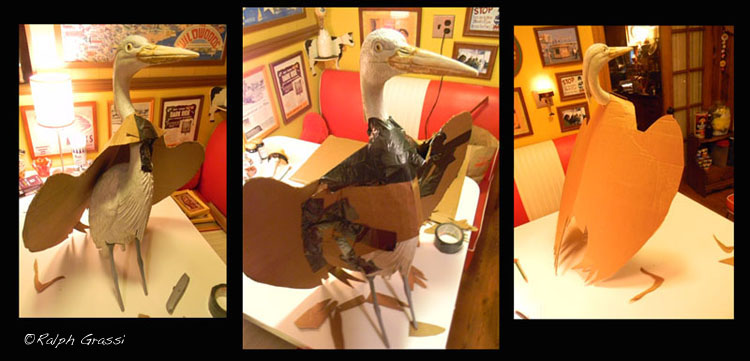
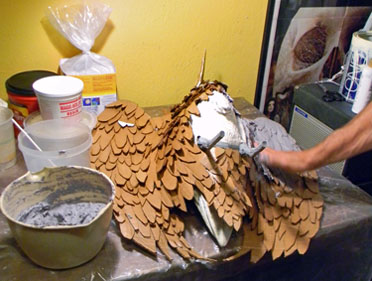
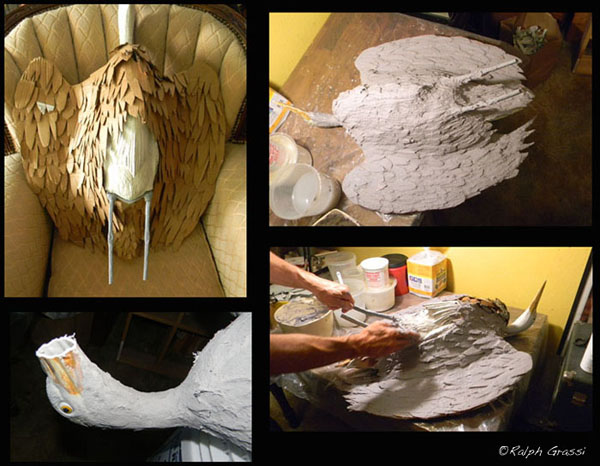
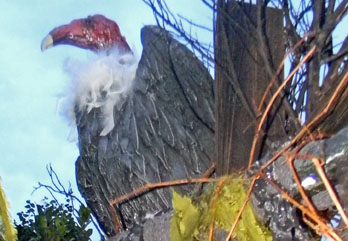
Adding the vulture (turkey buzzard to be precise) to the scarecrow came as an afterthought and the clock was ticking, so to save some prep time I used an old plastic ornamental garden heron for my form. The heron had the basic shape I needed to build on which saved me the time of constructing an armature. The wings of the heron were closed and molded into its sides so I created a pair of open wings from cardboard (pictured below). I also built the chest out with cardboard covering a majority of the heron's long neck. |
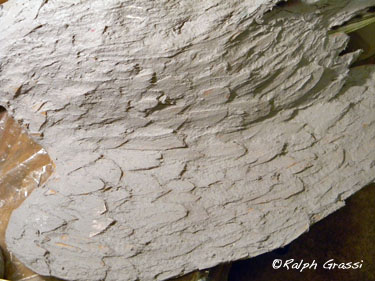
Next I cut feather shapes out of cardboard and hot glued them to the wings. I then coated the feathered wings with papier mache pulp, being sure to push the mixture into any gaps in the feathering. |
Unlike a vulture, the beak of a heron is long and pointed so it was nessesary to cut it off and sculpt a new one (pictured below left). To resemble a vulture the head needed to be reshaped as well. These changes were achieved by using a combination of papier mache pulp and epoxy resin. |
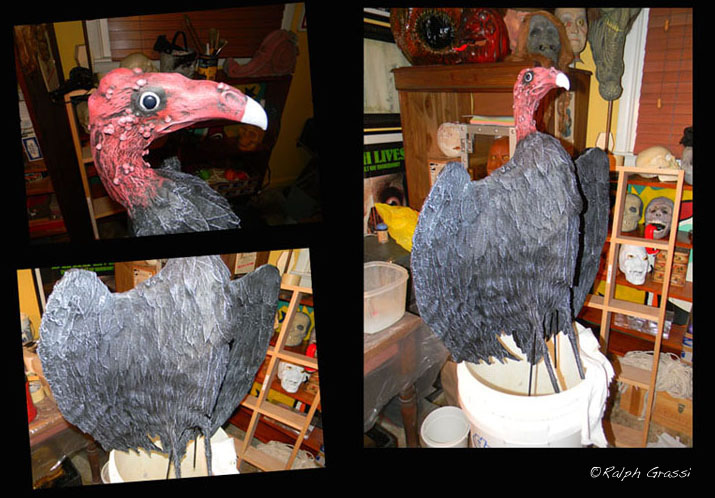
After sculpting the head, neck and beak, I added shiny black buttons for eyes. A little more tooling work on the head with epoxy resin and the turkey buzzard was nearly complete. Detailed paint work was followed by four coats of polyurethane (applied for protection from foul weather) however, I was not happy with the shiny finish so I corrected it by spraying a final coat of clear matte acrylic which eliminated the shine and, I feel, gave the bird a more realistic look. |
Adding white plumage around the neck was the finishing touch. |
Copyright 2001-2013 Ralph Grassi
|